Nope, making puff pastry from scratch is not difficult. Yep, it will take an hour or 3, but most of that can be spent chilling on the sofa or being a bit more productive perhaps, and start prepping your pie filling(s). This guide will tell you exactly how to make puff pastry from scratch.
If you’ve made a massive f-up and your pie or whatever you were making with the pastry, did not puff at all after baking it… Soz, there’s not much one can do to fix it. But there are various f-ups you can make during the process that are totally fixable.
It’s actually just best to be aware of a few things and try to prevent any f-ups.
What you’ll get from this guide
- A tiny bit of puff pastry science. It’s way easier to prevent f-ups if you understand why and how puff pastry puffs
- A few general tips to keep in mind when making puff pastry to prevent f-ups
- Tips from Nokx Majozi, head pie maker at The Pie Room and sous chef at the Rosewood Hotel in London.
- Quick fixes to problems
- My easy-to-follow step-by-step guide (with photos), specifically designed for first-timers and home cooks. No special fancy pastry equipment or ingredients are needed.
Puff pastry science: Why do puff pastry puff?
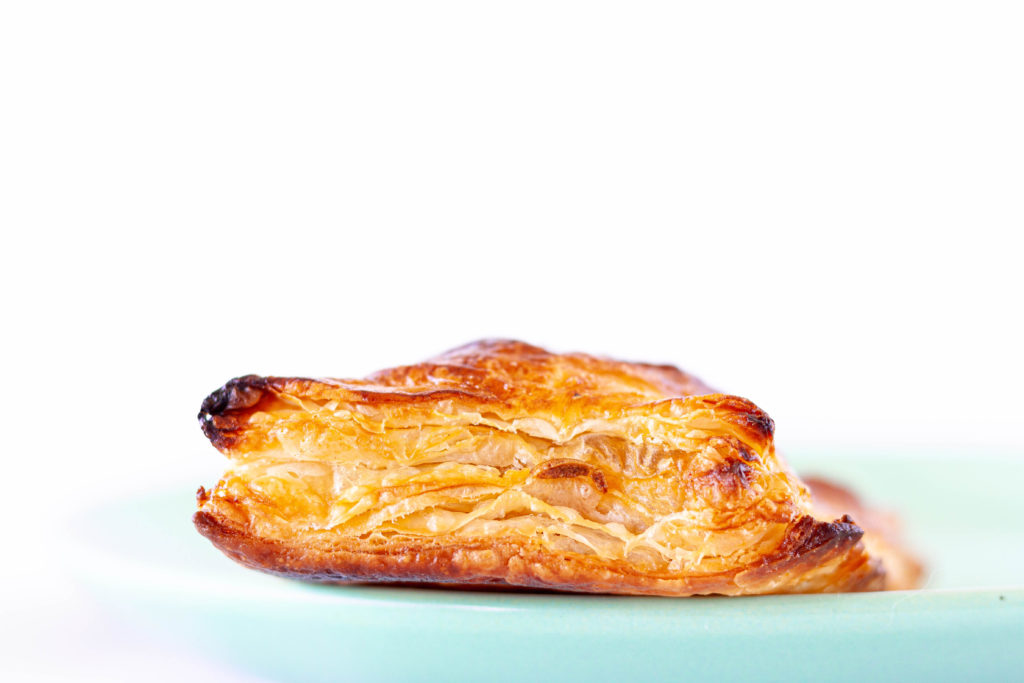
Puff pastry is made of multiple alternate butter-dough layers. Butter-dough-butter-dough-butter-dough. So many layers. All these layers are responsible for the puff pastry’s flaky structure.
But what is it that makes it puff so high up?
The butter plays a very important role in separating the dough layers from each other. When the pastry is exposed to high heat in the oven, the water in the dough (and some water in the butter) turns into steam (evaporates) and gets trapped between the separate layers, forcing the layers to expand. This leads to the expanded final product.
Tips to make your puff pastry successfully the first time
- If you keep the basic science behind puff pastry in mind, the most important tip is probably not very hard to guess: Keep everything very cold! The kitchen, your countertop, your ingredients, your hands. Everything needs to be cold. If the butter layers melt before you put the pastry into the oven, all the layers will become one layer and your pastry will not puff in the oven.
- Cool hands: You need to keep your hands cool all the time. If you want to do it by using a bowl of ice cold water or ice, make sure you don’t add any additional water into the pastry dough. Your hands should not be wet, only cold. Too much water in the pastry might make it tough and hard. Horrible.
- Work fast! Especially on a warm day. The longer you work with the dough, the longer it is exposed to your warm hands and the warm room temperature.
- Rolling out the pastry: Don’t use too much flour on your countertop or on your pastry board (#fancy). Use just enough to prevent the dough from sticking. Also remember to rub the rolling pin with a little flour from time to time. Lift the pastry occasionally from the board to prevent sticking. Direction of rolling: try to roll in one direction and always roll from the sides towards the center to keep the air in. Keeping in the air helps with the final expanded end product.
- Use fillings wisely. Fillings need to be very cold when adding them. If not, guess what? The butter layers will melt. It all leads back to the basic science of puff pastry. Also avoid using too moist fillings (like fruit fillings), the end product might be too soggy.
Tips from Chef Nokx Majozi
We chatted to the awesome pie queen, chef Nokx Majozi, about making puff pastry and she shared her advice for first-timers attempting puff pastry. Firstly, you need to make sure the butter is of high quality. “You don’t want to use butter with a high water content,” she says.
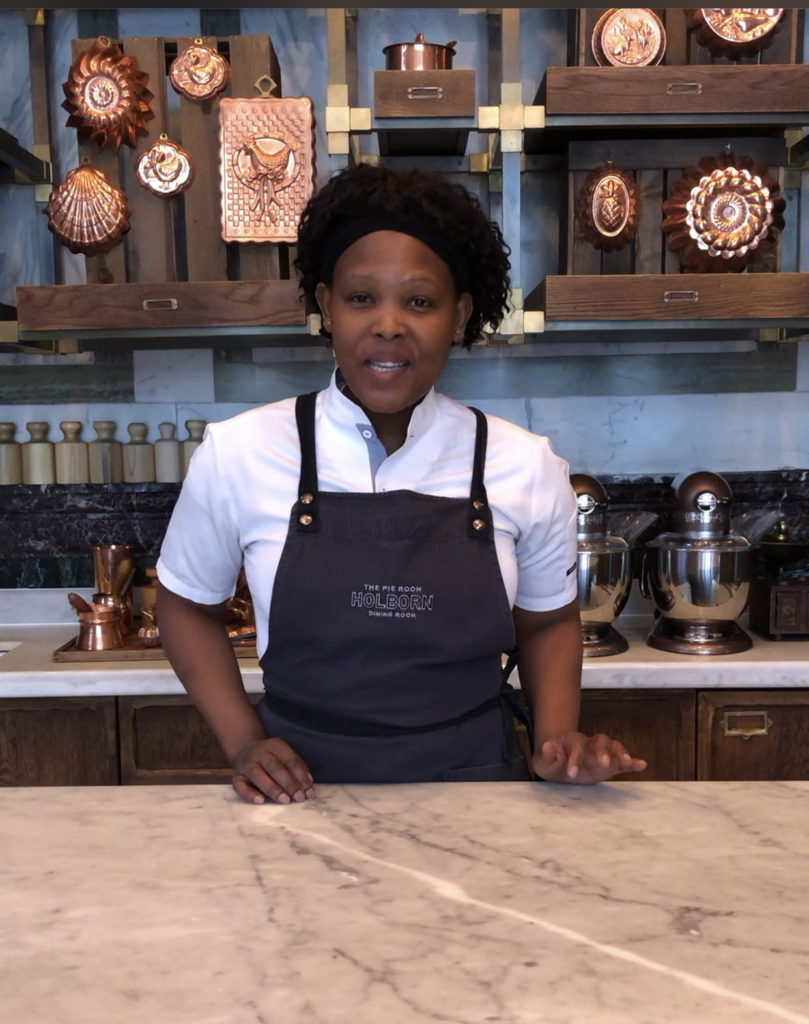
Photo: Supplied
How do you keep your hands cold?
“I was born with cold hands and I always complain about my cold hands. I even went to the doctor to ask why my hands are always cold.” Must be nice when you work with pastry every day.
“But if you have warm hands, wear rubber kitchen gloves. The gloves do not transfer the heat from your hands to the pastry.” She says the gloves you are supposed to wear are similar to medical gloves, it fits tightly.
What do you use to make an egg wash?
“I usually only use egg yolk for egg wash. If you only use the egg yolk, the end product will be more golden or darker in color. If you use the whole egg, the egg white will contribute to a lighter color. It comes down to what you prefer.”
How do you properly seal the edges of a foldover pie shape?
Nokx says you don’t need something special to seal the edges. You just press it down quite hard and seal it. “Sometimes it is challenging to do that when your pastry is a bit warm. Put it back into the fridge and let it firm up a bit. Then try again. You’ll see it works every time.”
My pastry dough is shrinking back when I roll it out. Why and how do I fix it?
The pastry normally shrinks when you overwork it. It’s the same as going to the gym and working those muscles. The more you work them, the tougher and harder they become. Same situation with pastry. The more you work with it, the “tougher” it gets. It makes it harder to roll out and when you roll it out, it often bounces back. So when you are making a pastry, you need to work quickly.
Quick solutions to problems
The butter melts
Problem: Pastry is getting too warm or butter layers start melting.
Solution: Chuck it into the fridge immediately until it firms up again.
The pastry has shrunk
Problem: Pastry has shrunk too much in the oven or has shrunk away from the side of the pan/dish.
Solution: Don’t add too much water to your dough initially. Add it gradually and stop when it is combined. The added water will evaporate in the oven and the pastry’s structure will tighten up and shrink. Also, make sure that your pastry is cold when you put it in the oven and that you bake it at the recommended temperature (usually between 220 and 260°C / 425 and 500°F for puff pastry).
The pastry is tough
Problem: The pastry is tough and hard after baking.
Solution: Don’t add too much water to the flour and butter initially. Don’t overwork the dough, gluten will start developing and the pastry will get tough. A light touch and quick actions are the answer.
The pie crust is soggy
Problem: The pie crust is soggy.
Solution: Don’t roll out the pastry dough too thinly and make sure not to add a too moist filling. Fruit fillings usually have a very high water content. heat it and let the water evaporate first. Or if you want to keep some of the juices, thicken it a bit with corn flour.
The pie has collapsed
Problem: The pastry has collapsed during baking.
Solution: Don’t open the oven during the first ¾ of the baking time. It will deflate or collapse. Stick to the recommended cooking time.
A step-by-step guide on how to make puff pastry from scratch
This is how I make my puff pastry. No fancy or special techniques, equipment, or ingredients are needed.
Equipment
A mixing bowl, four bowls, a rolling pin or wine bottle, two knives, or a pastry blender/cutter.
Ingredients
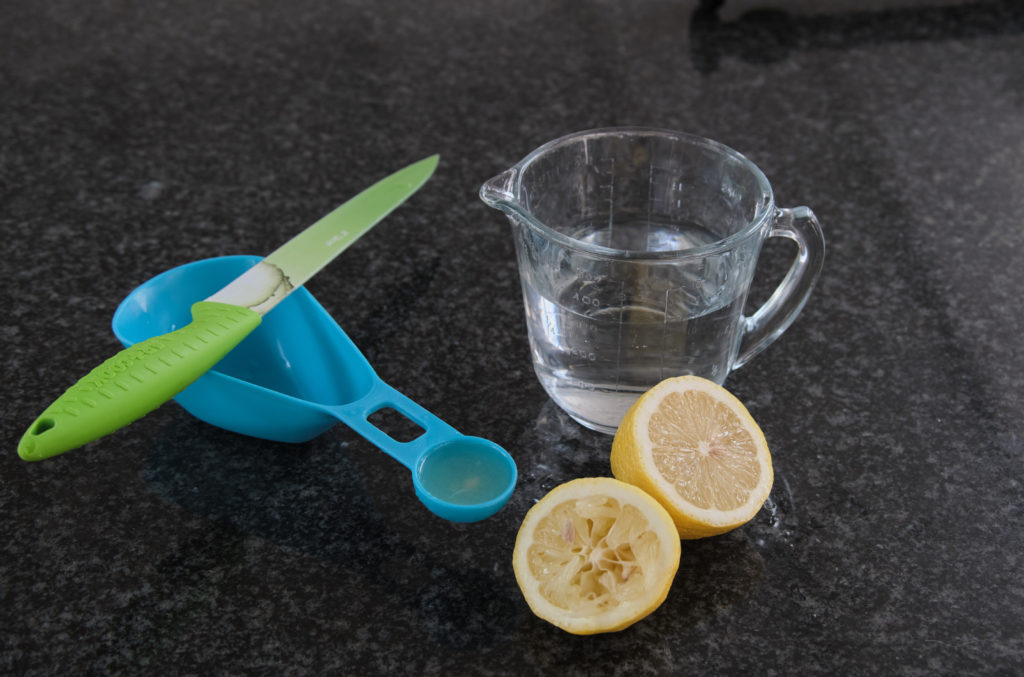
250 g ice cold water (250 ml / 9 oz.)
15 ml lemon juice (1 Tbsp.)
500 g cake flour ( 17.6 oz.)
5 ml salt (1 tsp.)
500 g frozen brick butter (17.6 oz.)
Step 1: Get the liquid ready
Mix the water and lemon juice and place back into the fridge to keep cool.
Step 2: Get the flour ready
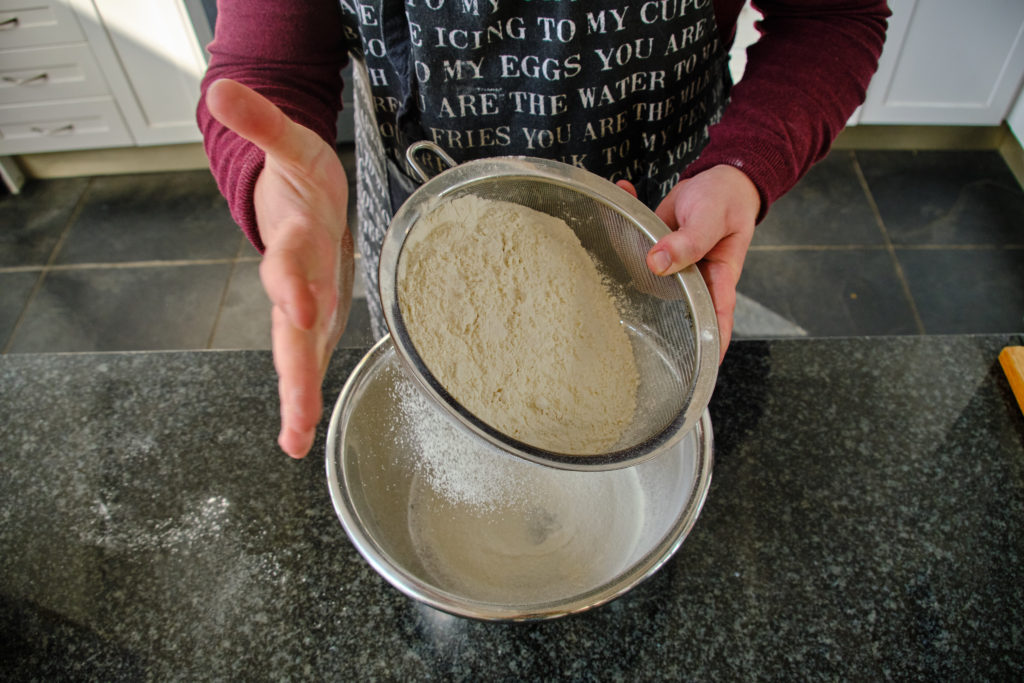
Sift together the flour and salt into a medium-sized mixing bowl.
Step 3: Make space in the freezer
Make space in your freezer and/or fridge for 4 medium-sized bowls (125 g / 4.5 oz. grated butter needs to fit into the bowls) and your rolling pin. Place the bowls in the freezer and/or fridge. The freezer works better, but if you have space issues, the fridge will do a fine job.
Step 4: Grate the butter
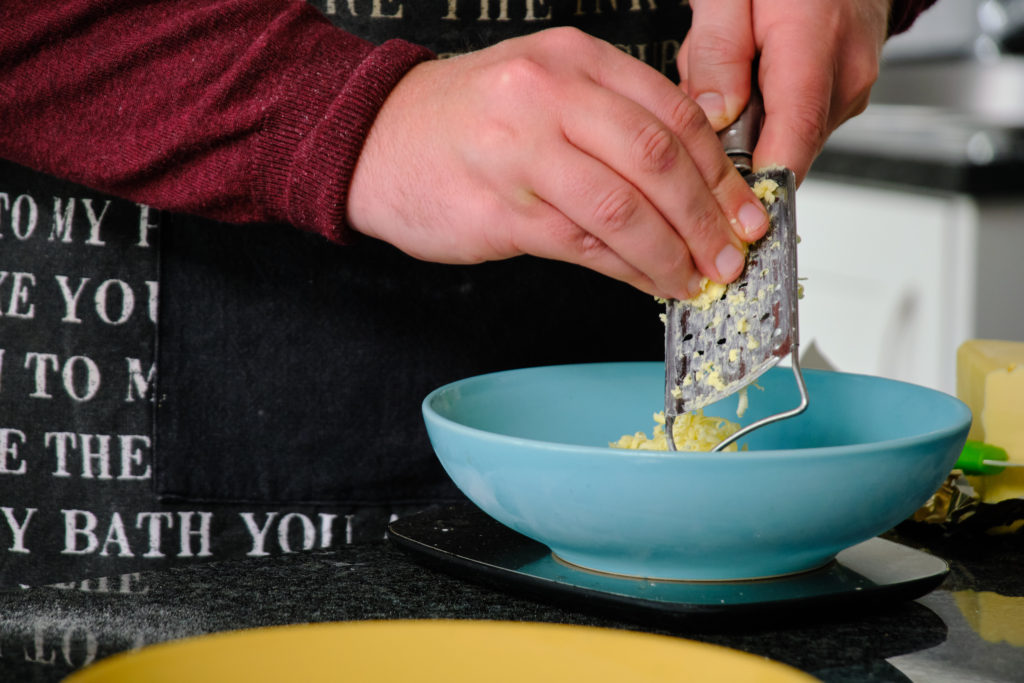
With cold hands, quickly grate the frozen butter. Make sure the butter does not get too hot and melt. Put it back in the freezer for a while, if necessary, and keep your hands cool. Work fast. Divide the grated butter into four equal parts (125 g / 4.5 oz. each) and place each part into a cold bowl and place it back into the freezer or fridge. Keep the bowls in the freezer until you need to use them.
Step 5: Cut one part butter into the flour
Using two knives (or a pastry blender if you have one), cut one part/bowl of grated butter (125 g / 4.5 oz.) into the flour. Continue cutting the butter into the flour until the mixture resembles coarse crumbles. It will look rough and not like a well combined dough.
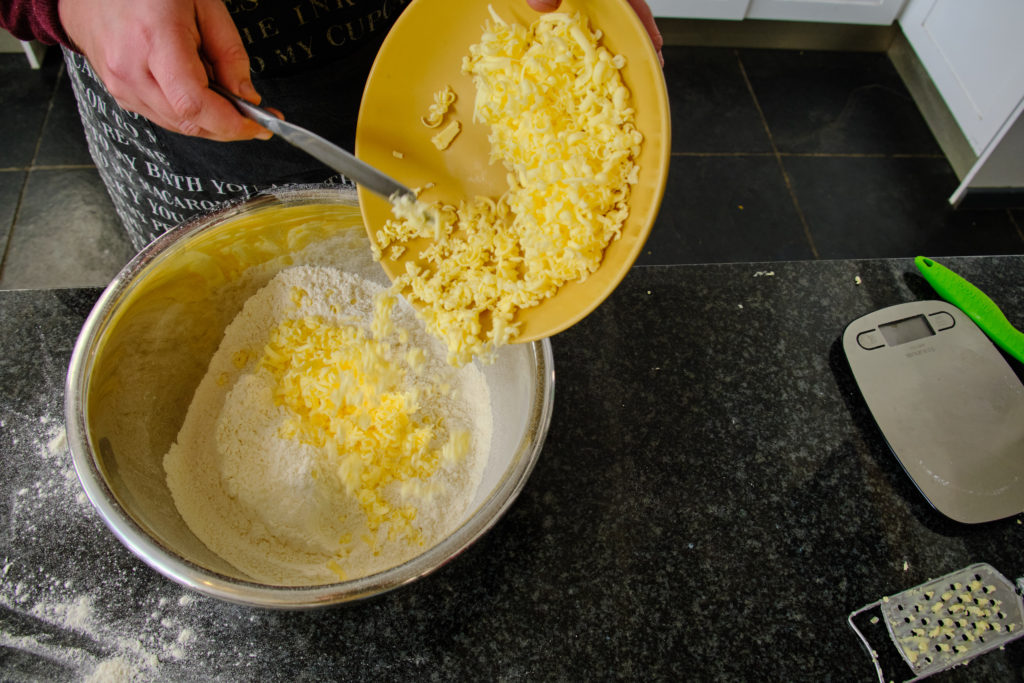
Step 6: Add the liquid and mix with a fork
Sprinkle the water and lemon juice mixture evenly over the flour and butter mixture, making sure not to add the majority of the water in one place.
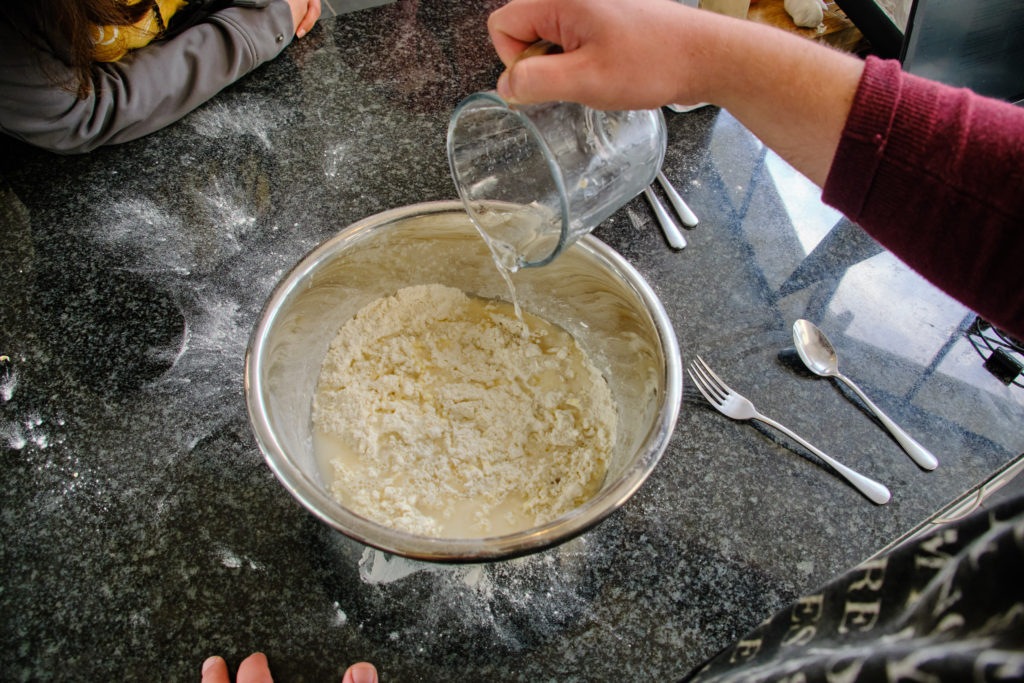
Mix with a fork until a manageable dough forms. It will still look rough at this stage, but it should form one ball of dough when done mixing.

Step 7: Get the dough into shape
With cold hands and on a cold working surface like a marble top, quickly throw the dough about 15 to 20 times against the cold surface until a smooth and elastic dough is formed. Don’t touch the dough too much or overwork the dough in any way. Keep everything cold at all times.
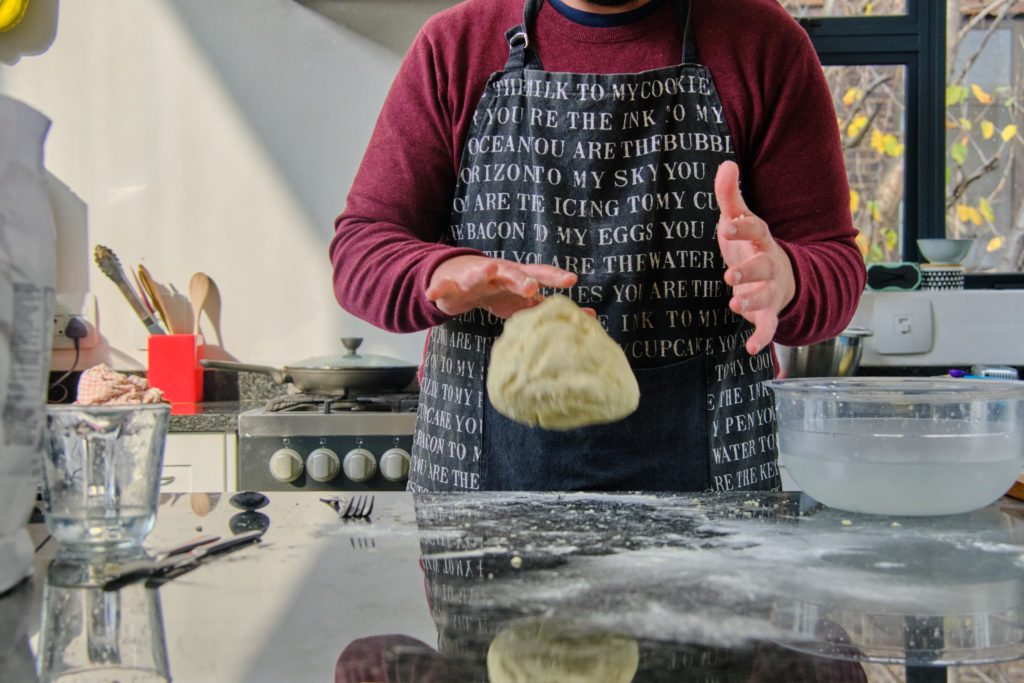
Step 8: Roll the dough
Sprinkle your cold working surface very lightly with flour. Using a cold rolling pin, roll the dough into a 25- by 50-cm / 10- by 20-inch rectangle. The rectangle should be about 5 mm / 0.2 inches thick. Keep the dough in a rectangle as much as possible and lift it from the cold surface every now and then to make sure it doesn’t stick to the surface.
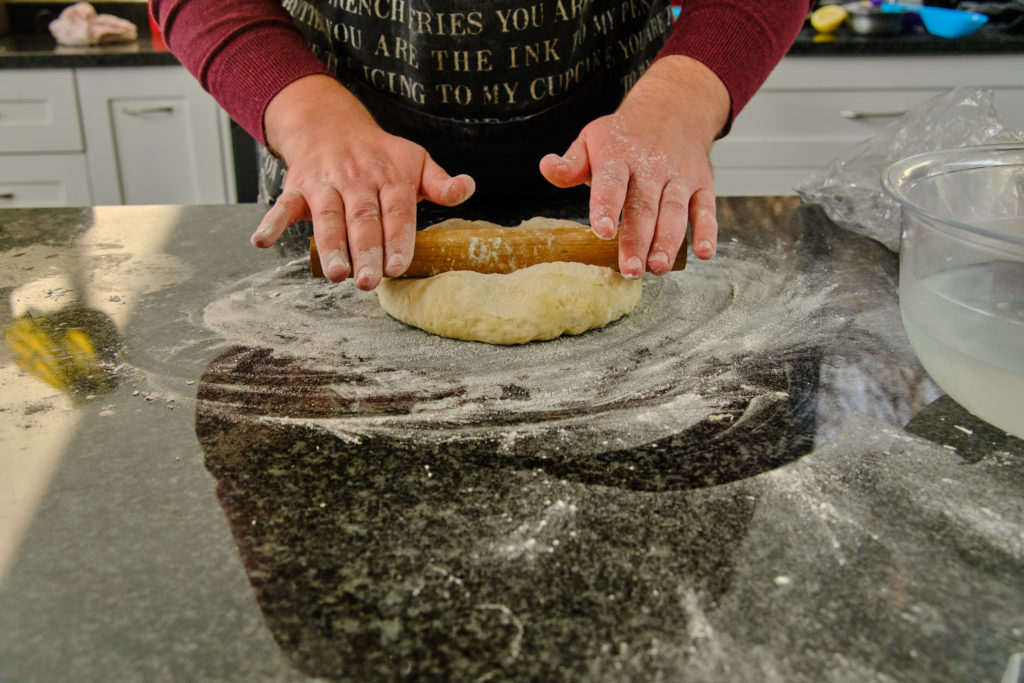
Step 9: Add butter and fold the dough
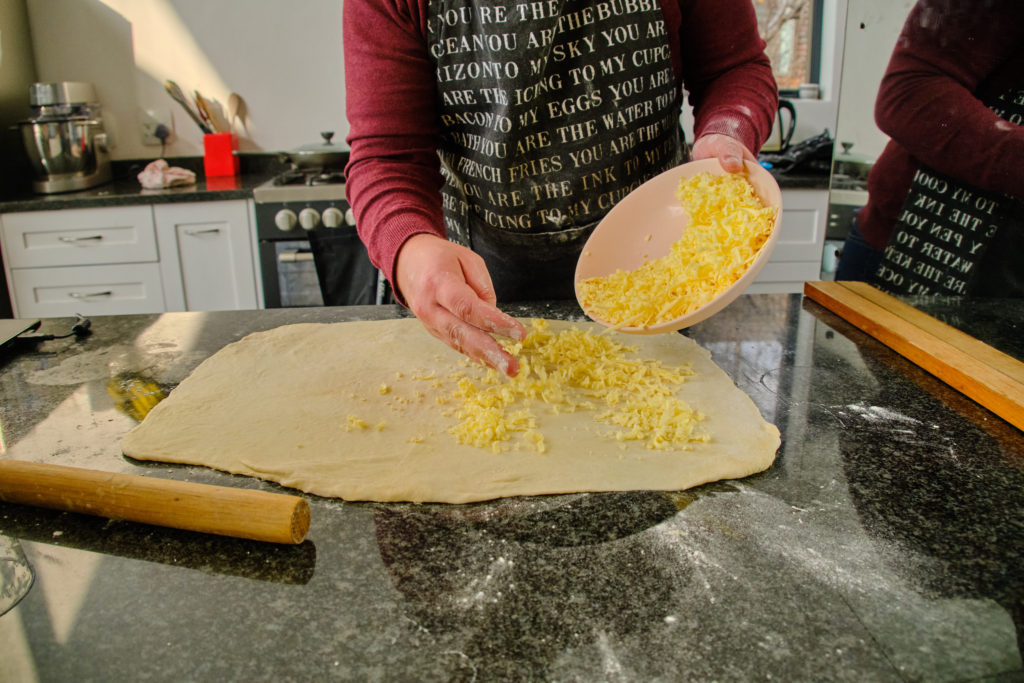
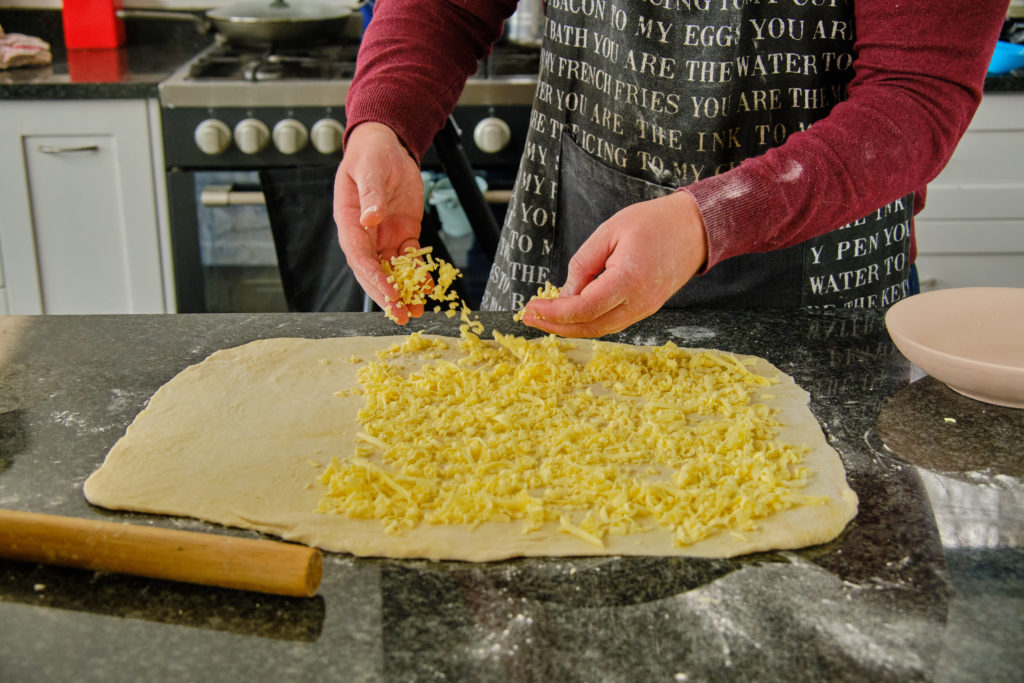
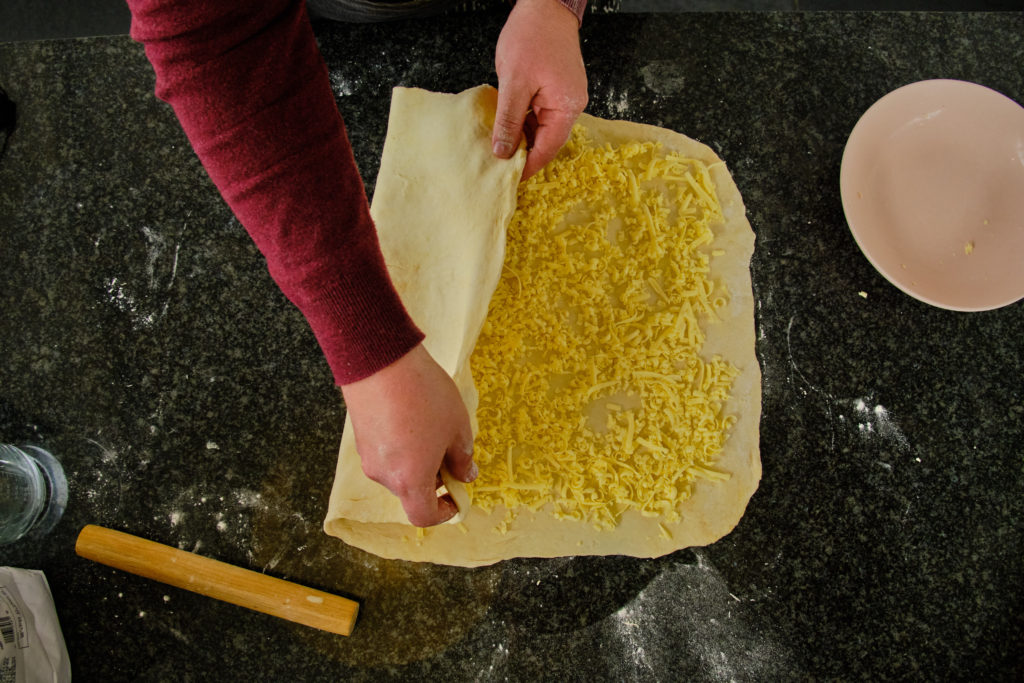
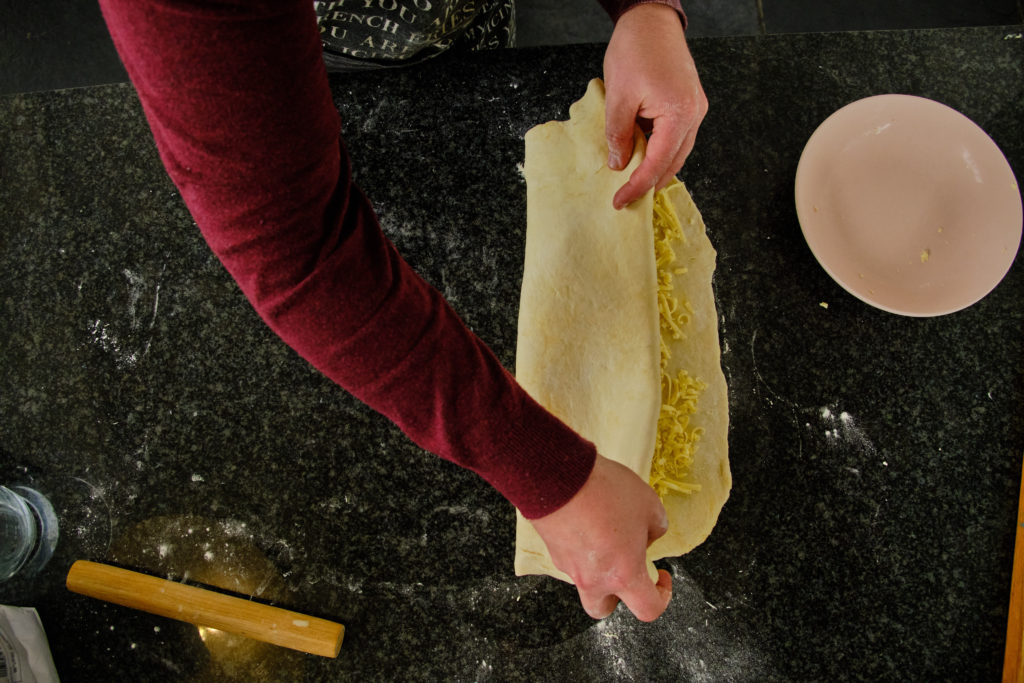
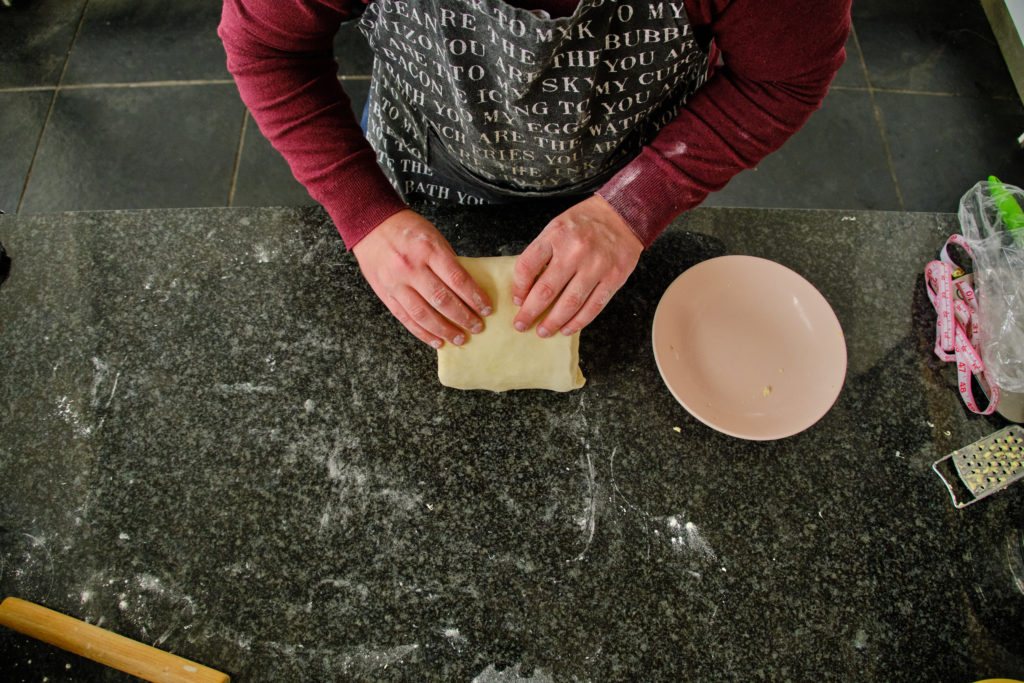
Cover two-thirds of the rectangular rolled-out dough with another part of the ice cold grated butter (125 g / 4.5 oz.). Fold the dough in thirds and make sure the part without butter, is in between the two parts with butter. Thus 3 layers of dough with two layers of butter alternately in between each layer of dough. Press down and seal both edges of the dough to keep the air that was folded in, inside.
Step 10: Fold again
The dough starts forming a long rectangle. Starting from one short side of the rectangle, fold the dough in thirds. Press down and seal both edges again.
Step 11: Cover and cool
Wrap the dough in a moist cheese cloth or foil to prevent it from drying out. Place in the fridge to cool for about 20 minutes. Don’t place it in the freezer. The dough should just be cold and not get hard.
Step 11: Repeat steps 9 to 11 twice
Roll out the dough again as described in step 8. Repeat the folding process (steps 9 to 11) twice with the remaining two parts of the butter, remembering to rest the dough for 20 minutes between each time (step 11). Work fast and with cold hands.
Step 12: Final fold and rest
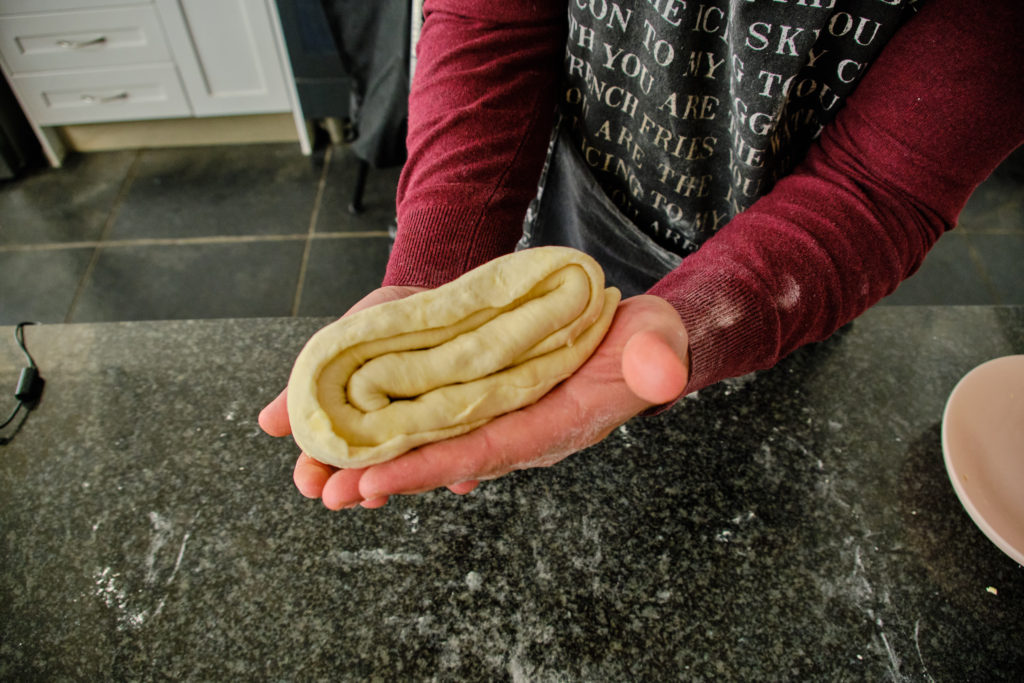
Now all the butter is folded into the dough. Roll the dough out again and fold in thirds to form quite a small square. Wrap again in foil or a cheesecloth. Place in the fridge for about 30 minutes.
Step 13: Shape and bake
Roll out the dough quite thin, about 5 mm / 0.2 inches. Cut the dough into the desired shape(s) for whichever purpose(s). Make sure not to stretch the dough when cutting it. Cool the end product (e.g. the pie) in the freezer for about 20 minutes and bake in a very hot oven.
Puff pastry must be very cold when you bake it in a very warm oven of about 220 to 260 °C / 425 to 500 °F. Decrease the temperature after 5 to 10 minutes by 10 to 20 degrees.
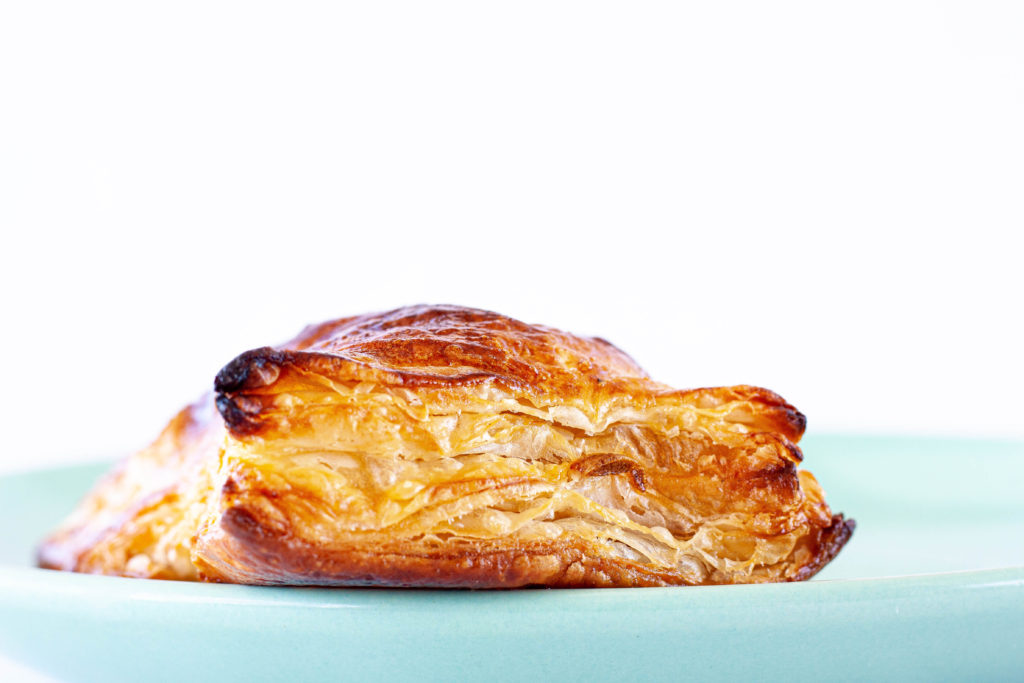
Photo: Hannes Kruger
