It has so many applications. To mention a few, think of a crème caramel, praline, soft caramel chews, fudge, salted caramel ice cream, or just a plain caramel sauce to pour over everything. Caramel might seem a bit intimidating to home cooks, but luckily we live in a day and age where everything is either simplified or spelled out. We’ll do both in this guide and tell you exactly how to make caramel from scratch at home.
Actually, it’s nonsense that making caramel has a reputation for being complicated. It’s super easy and fast. If you want to start a caramel product range, then yes, a bit more complicated. But just a quick caramel sauce (3 simple basic ingredients) to drizzle over your bowl of ice cream on a Monday morning is really painless and pure happiness.
A tiny bit of science: What is caramel?
It is basically burnt sugar. You cook the sugar until it browns. It makes sugar less boring. Granulated sugar (sucrose) does not really smell like anything and the taste is quite simple. When we heat sugar it melts and darkens and develops more complex aromas and flavors. But why though?
When we heat sugar, the sucrose molecules break down into glucose and fructose. And then it gets complicated from an amateur scientific viewpoint: The glucose and fructose break down into more molecules as we keep heating it. All of them react with one another to create new aromatic compounds like hazelnut (furans), butter (diacetyl), fruity aromas (ethyl acetate), and a roasted aroma (maltol). The process is called caramelization and it is why caramel is so toasty, nutty, and just damn delicious.
It also makes one think about the importance of heat and cooking in general. We do not only heat food to cook it thoroughly. By heating our ingredients in certain ways, we want to develop complex flavors to enjoy our food so much more. Sometimes it’s the only reason we do it. Like when making caramel. Why would one sit with a bowl of sucrose and eat it as is? Life is simply too short.
But life is also too short to struggle with making a caramel when it is absolutely unnecessary.
We chatted to chef Nic van Wyk, chef and hospitality consultant, to help us make our caramel lives easier. Nic says making caramel is indeed an easy process. You just need to be aware of a few things:
Making caramel at home: Dry or wet method?
There are two ways to caramelize sugar:
1. Dry method
Add sugar to a saucepan, heat, and caramelize the sugar.
2. Wet method
Add a little water with the sugar to a saucepan, dissolve the sugar, heat, and caramelize the sugar.
Nic says both methods will have the same end result. He recommends the wet method for first-timers. The water helps heat the sugar more evenly and gently without the risk of burning it too quickly.
According to Nic, there are a lot of chefs preferring the dry method, simply because it’s faster. For the wet method, you’ll have to wait for the water to evaporate first. But for the dry method to be successful, you need a proper saucepan that regulates heat very well and you need some experience in heat regulation.
How to fix possible mistakes when making caramel (wet method) at home
1. The sugar recrystallizes and the sugar syrup turns grainy
Horrible! If this happens, you can add a little water. Dissolve the sugar crystals again and start over.
However, Nic says it’s best to prevent recrystallization to happen in the first place by:
- Making sure the sugar is fully dissolved before bringing the sugar syrup to a boil.
- Making sure you don’t accidentally add a drop of water or any other liquid before the sugar is caramelized.
- Not stirring your sugar syrup once it boils. Just leave it as is until it starts caramelizing.
- Applying even and gentle heat regulation from the very beginning.
Do you really need a pastry brush to prevent recrystallization?
One often reads that you need a damp pastry brush to wash down the sides of the pot or saucepan while the sugar syrup is boiling. It is sometimes necessary to do the brushing thing when working with sugar syrups with much higher sugar content. It’s not absolutely necessary when you make caramel, but then you’ll have to make sure of the following:
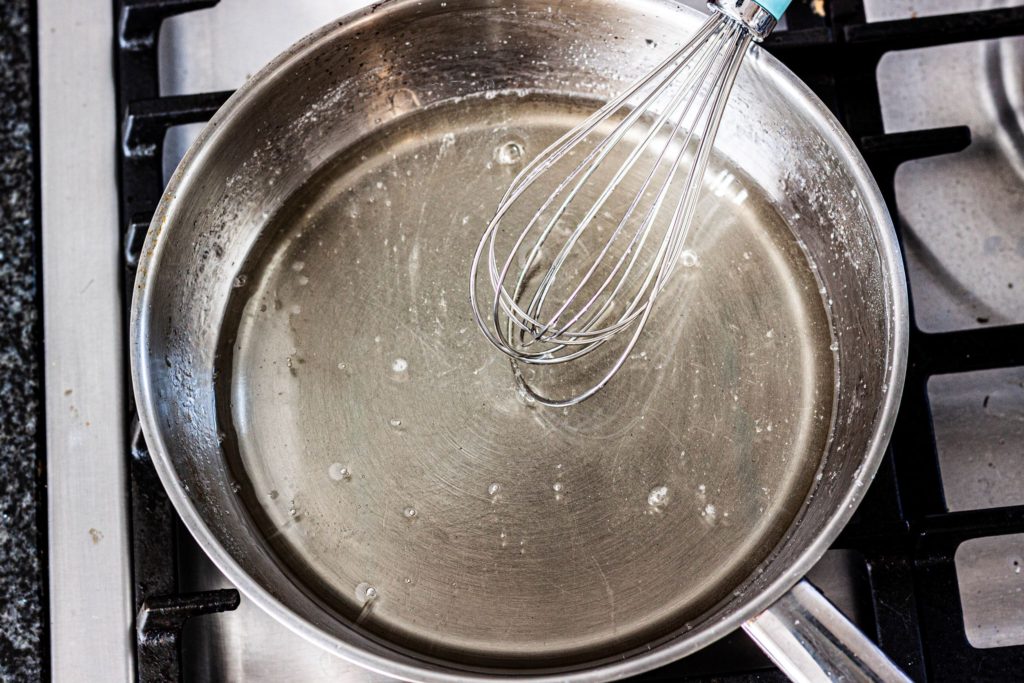
- You need to stir that syrup vigorously before it comes to a boil and make sure the sugar is 100% dissolved. You should not see a single sugar crystal in the saucepan. It should look like a very clear liquid.
- Bring the syrup slowly and evenly to a boil.
Nic says when you decide to use a brush, make sure not to dip your brush in too much water. I say just leave the brush. Every time I thought I was fancy with my pastry brush, my sugar syrup recrystallized because every time I do exactly what Nic warns us against: accidentally dropped water into the sugar syrup with my brush, and guess what? A chain of recrystallization occurred.
Do you really need glucose (corn syrup) to prevent recrystallization?
Nah, not for caramel. Nic says you can make an effortless and successful caramel without using glucose or corn syrup.
When making other candies like nougat, you’ll need glucose to help prevent recrystallization because of the high sugar content. In comparison, caramel sauces and candies have less sugar and higher fat content. The clever people refer to it as a noncrystalline confectionary.
2. I’ve burnt my caramel. Can I fix my burnt caramel?
There’s nothing you can do to fix your burnt caramel. Maybe you’ll get one or two people that will enjoy the intensely bitter taste of a black caramel. Most people will probably not enjoy it.
Nic says you can only prevent your caramel from burning by keeping your eye on the sugar syrup when it starts caramelizing. Once your sugar syrup is heated enough to start browning, the boiling point rises quite rapidly and you’ll end up with a black caramel quickly if you do not keep an eye on it.
Do you really need a candy thermometer to prevent the caramel from burning?
According to Nic, you can prevent your caramel from burning without a thermometer. He says there’s a fine line though because you want bitter undertones in your caramel, but you don’t want it to be too bitter.
It comes down to personal preference actually. So the sugar syrup will first turn into an amber color and then it will darken the more you expose it to heat. The more it darkens, the more bitter the end result will be.
Do you need a candy thermometer to determine the consistency of your caramel?
If you are a very precise person and like consistent results every time you make caramel, then yes.
So when making a caramel sauce, for example, you will follow an easy two-step cooking process:
- First, you’ll caramelize the sugar (dry or wet method).
- Then you’ll add the cream, but it will be a very runny liquid and you’ll have to cook it again to achieve your desired consistency.
Step 1 you can gauge with the eye. You can’t do it with step 2. You’ll have to either set a timer (not super accurate) or use a candy thermometer (way more accurate). Even when you have cooked it to the desired temperature, you still won’t be able to see the end result. You’ll have to wait because the caramel thickens as it cools.
I’ve made caramel sauce multiple times without a thermometer. I even accidentally made caramel fudge (cooked it too long during step 2). It’s very cool to see what different caramel end results you can get when cooking it to different temperatures during step 2.
So if you have a candy thermometer and make a caramel sauce, cook the caramel until it registers 106°C (223°F) on your thermometer. You can even push it to 107°C (225°F). If you do not have a candy thermometer, it will take approximately 4 to 5 minutes of cooking over medium heat. The longer you cook it, the thicker the end result will be. You can cook it up to the point where you get a hard fudge.
How to easily fix a too thin or too thick caramel sauce
Too thick? Add a bit of cream and stir.
Too thin? Heat for another 1 to 2 minutes and let cool.
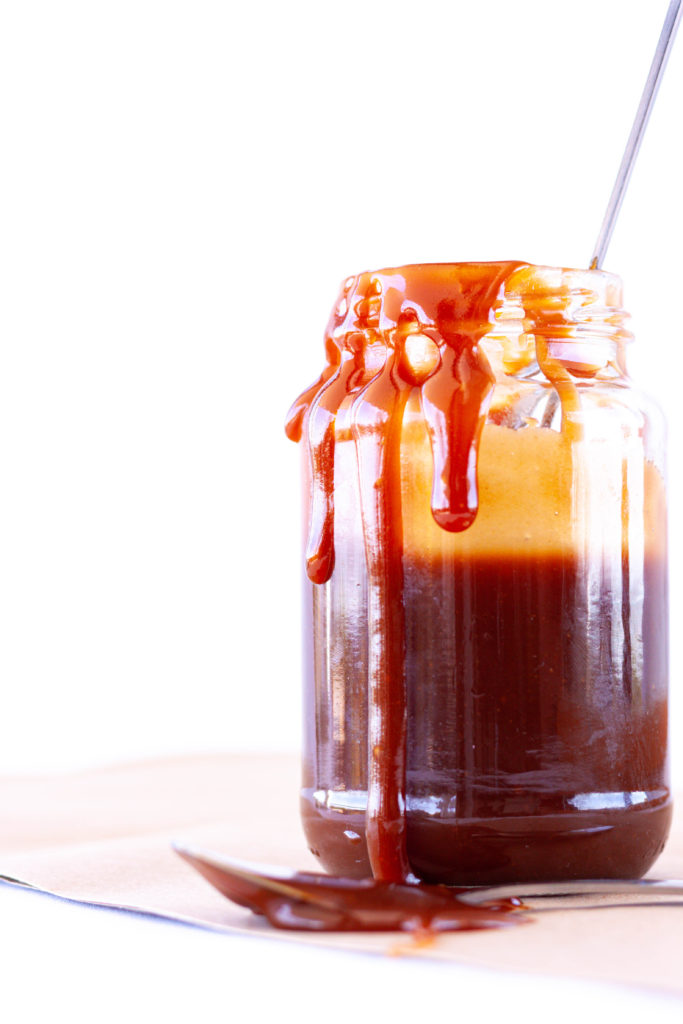
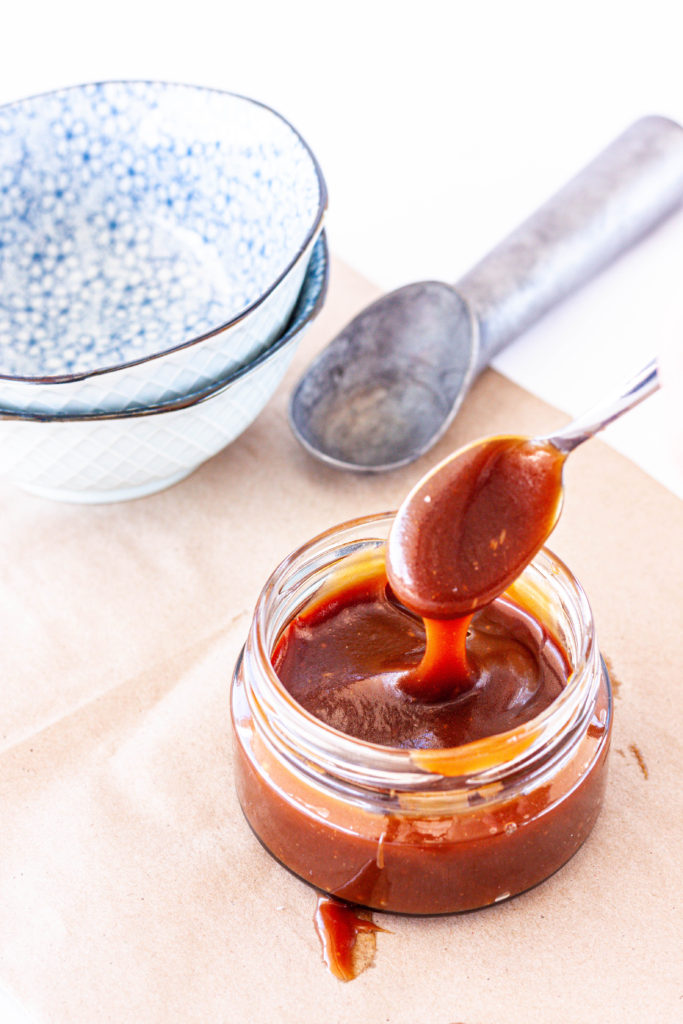
Our quick and basic homemade caramel sauce recipe
Ingredients
125 ml water
250 ml sugar
180 ml cream
Salt to taste
5 ml vanilla extract (optional)
Step 1: Get everything ready
Boil water and add 125 ml boiled water to a 3-quart (about 3 liters) heavy-bottomed stainless steel saucepan or saucier. Measure your cream, add to a pouring jug and set aside.
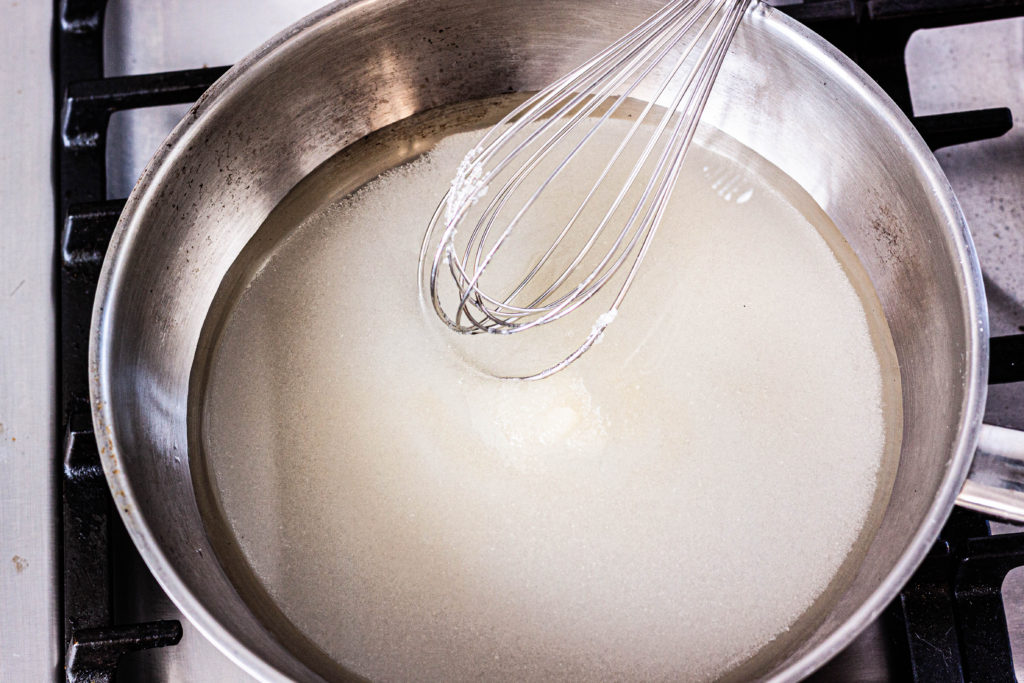
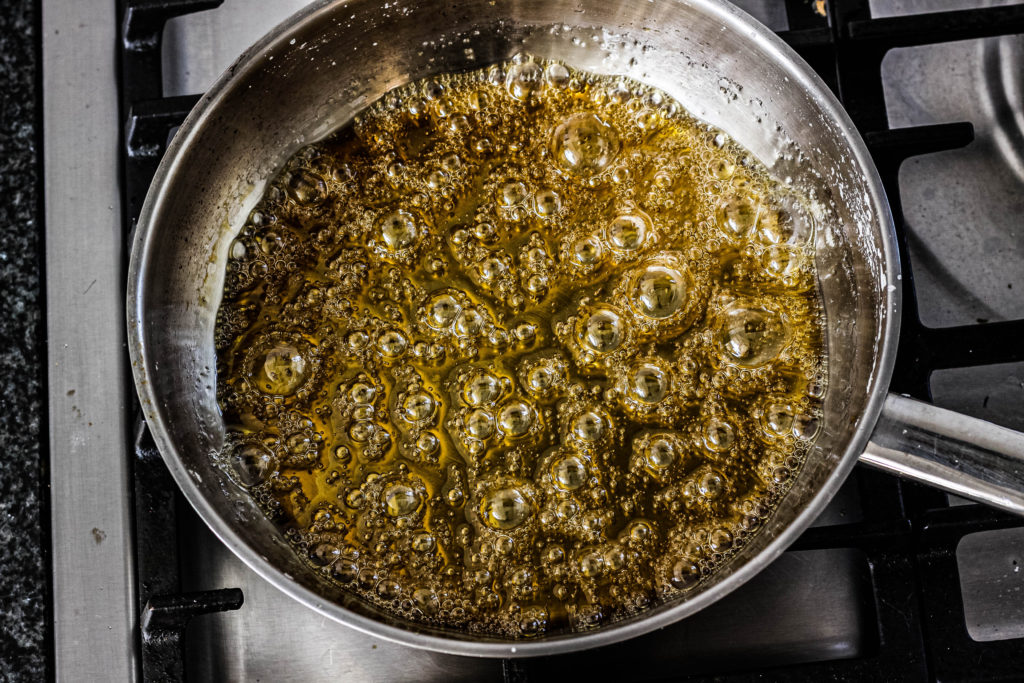
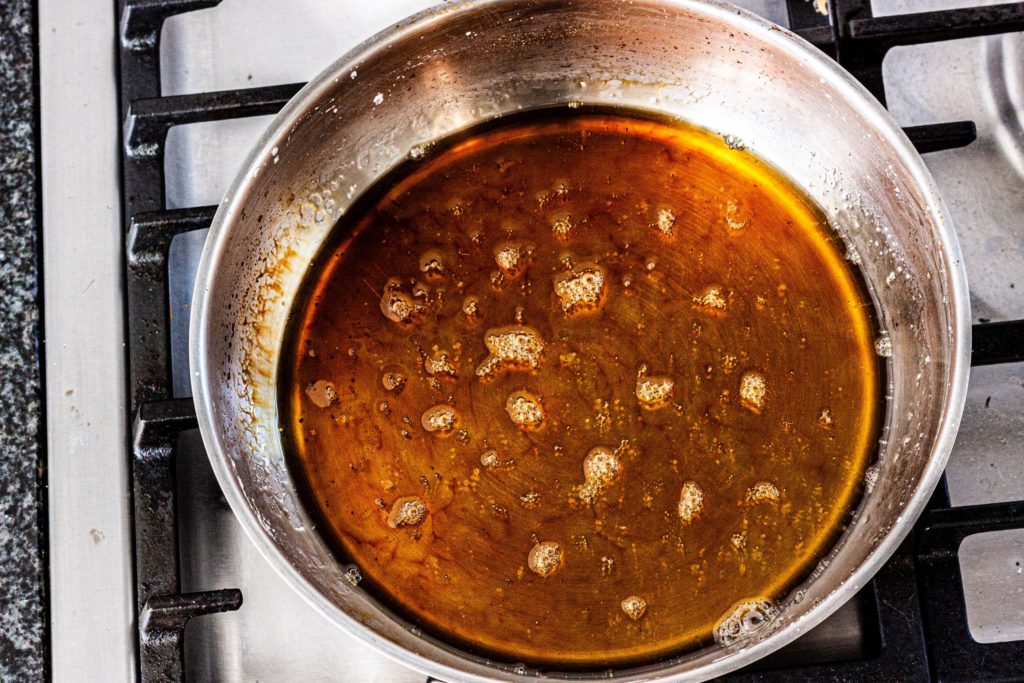
Step 2: Caramelize sugar syrup
Add the sugar to the water and stir until sugar is completely dissolved over medium heat. Keep stirring until syrup comes to a boil, about 5 minutes. (The liquid should be clear and no sugar granules should be visible.) Stop stirring when syrup boils and continue simmering until honey-colored, about 10 to 15 minutes. The moment when there are signs of caramelization (honey / amber color), swirl the pan to ensure even caramelization.
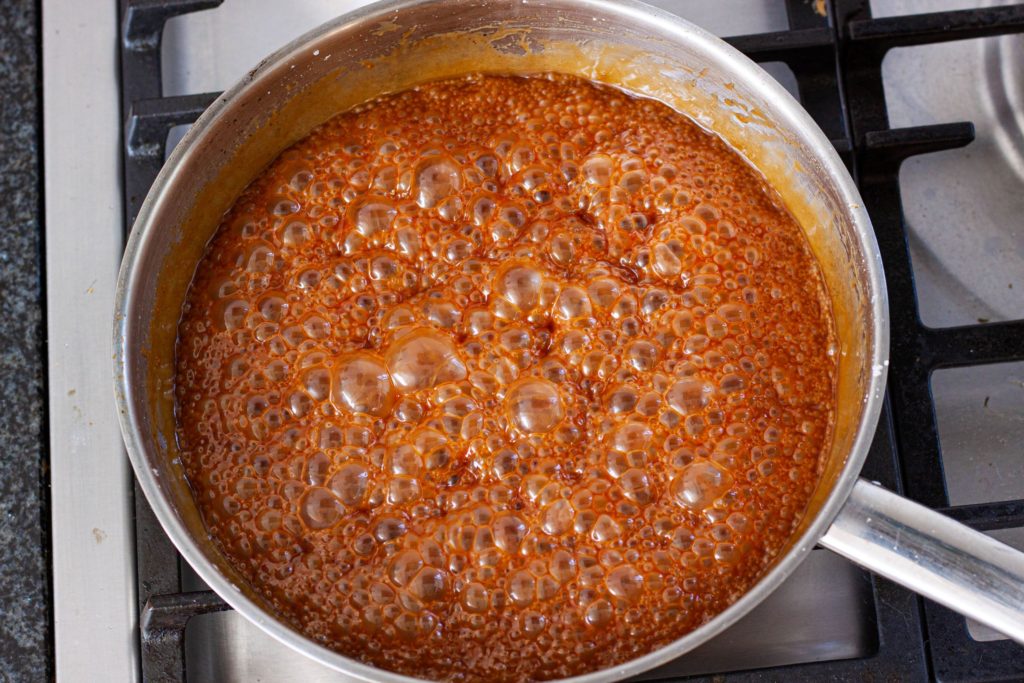
Step 3: Add cream and cook the caramel
Take the caramel off the heat and immediately add cream while stirring constantly with a whisk. Add salt to taste. Return to low heat and continue simmering until caramel registers 106°C (223 °F), about 4 minutes. Take off the heat and stir in vanilla extract (if using). Transfer to a glass jar or other heat-resistant container and cool to room temperature. Remember: it will still be runny when hot, it thickens as it cools.
Additional sources
- Caramel flavour perception: Impact of the non-volatile compounds on sensory properties and in-vitro aroma release by Laurianne Paravisinia, Cedric Morettonb, Cecile Gouttefangeasb, Henri Nigayb, Catherine Dacremonta, and Elisabeth Guichard, published in Food Research International journal – 100 (2017) 209 – 215.
- Food Biochemistry & Food Processing by Y.H. Hui, published by Blackwell Publishing in 2006.


